SUMMER | 20
September 17th, 2020![]()
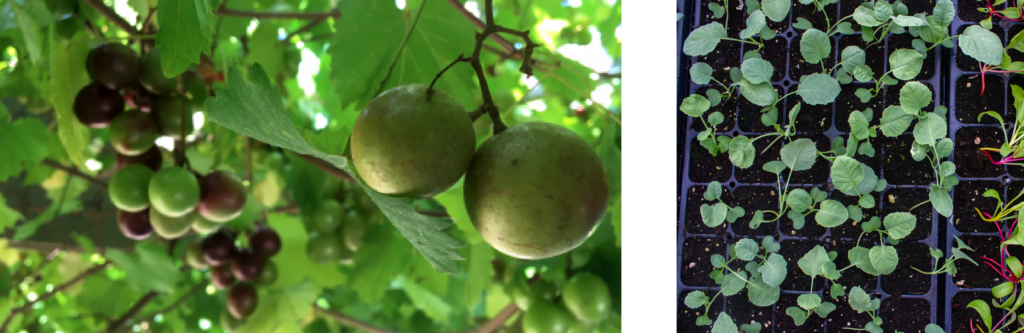
MUSCADINES & SCUPPERNONGS
August in Alabama means muscadines and scuppernongs. If you’ve ever walked a dirt road in Alabama, then chances are you’ve seen these wild grape vines making their way up trees. At Avondale Elementary, they provide much needed shade to the Teaching Farm. If you’ve never had muscadines and scuppernongs, then you’re missing out. They are much sweeter and larger than traditional grapes. The catch is that they have seeds and their skin is quite thick. In fact, the skin is so thick that it’s very easy to remove simply by biting the grape.
Both muscadines and scuppernongs start out green, but muscadines ripen to a deep purple and scuppernongs ripen to a bronze hue when they are ready. The flavors between the two are distinct enough for most folks to have a preference for one or the other. However, both are packed with fiber and antioxidants, so you really can’t go wrong.
TOMATO & PEACH POT PIE
Ready in 45 minutes
Serves 4
For the pie:
—2 cups flour
—1/2 tsp. salt
—12 Tbsp butter, frozen
—1/3 cup ice water
For the crust:
—1 Tbsp. rosemary, finely chopped
—2 Tbsp. olive oil
—1 small onion, sliced
—3 medium tomatoes, wedged
—2 medium peaches, wedged
—1/2 tsp. salt
—black pepper to taste
- Dice frozen butter into 1/4”cubes.
- Place flour, salt, frozen butter into food processor and pulse 2-3 times. (If you do not have a food processor, add the ingredients to a bowl and use a fork, knife, or pastry cutter to mix and combine butter with dry ingredients.)
- Remove ice from water and measure out 1/3 cup, add to food processor. Pulse additional 3-5 times until dough resembles small peas and holds a ball when pinched. (Again, this step can be done by using a fork, knife, or pastry cutter.)
- Transfer dough to mixing bowl and finish kneading by hand, being careful not to overwork the dough. Form into ball/disc shape and transfer to plastic wrap.
- Wrap tightly and chill for 2 hours or overnight.
- Remove dough from refrigerator and allow to warm to room temperature. Sprinkle 1 tablespoon of rosemary over dough and roll with rolling pin on a lightly floured surface. Try to roll using even pressure while forming dough into a 1/8” thick circle about 9″ around.
- Heat the oil in an 8- or 9-inch cast iron skillet or oven-safe frying pan over medium-high heat until shimmering. Add the onion and sauté until softened and lightly browned, about 5 minutes. Remove the skillet from the heat. Add the tomato wedges, peach wedges, remaining 1 tablespoon of rosemary, salt, and a few grinds of black pepper. Toss to combine.
- Place the pie crust over the tomato and peach mixture, folding under any edges so that it sits flat on the filling. Use a sharp knife to cut 4 (1-inch) slits in top of the crust to vent.
- Bake until the crust is lightly browned, about 15 minutes. Reduce the oven temperature to 375°F and continue to bake until the crust is golden-brown and the filling is bubbling, about 10 minutes more. Let cool for 10 minutes before serving.
![]()
POPPIN’ PEPPERS
Some of our favorite summer crops are the wide array of hot and sweet peppers that we grow. This year we have added a new variety to the bunch: the Habanada! Habanadas look almost exactly like habaneros but they aren’t spicy at all. They have all the lovely flavors of a habanero without the fire so you can snack on them without fear. Our staff are enjoying them and we hope to grow them for years to come.
![]()
MEET FARMER JERICK
We have exciting news to share with the Glen Iris community: Farmer Jerick is now officially the Good School Food Instructor at Glen Iris Elementary School! Farmer Jerick spent this summer as a Graduate Apprentice working hard to make the Teaching Farm look amazing while also helping create our first ever virtual summer camp: Camp Grow. Farmer Jerick is looking forward to
this school year and collaborating with teachers to make this year as fun as possible for students, parents, and educators. He has lots of lessons up his sleeve that he can’t wait to share.
HOMEMADE VEGGIE PIZZA
Makes two 10 inch pizzas
For the dough:
—3/4 cups lukewarm water
—1 tsp active-dry or instant yeast
—2 cups unbleached all-purpose flour
—1 1/2 teaspoons salt
For the toppings:
—For the base, classic red sauce or a white sauce, a thin spread of ricotta cheese, or a simple brush of olive oil
—Sautéed vegetables
—Mozzarella, provolone, Parmesan, fontina, romano, and/or asiago cheese
- Preheat oven to 500°F or as hot as it will go.
- Combine water and yeast in mixing bowl, stirring to dissolve the yeast. Mix in flour and salt until you’ve formed a shaggy dough.
- Turn the dough out onto a clean work surface along with any loose flour still in the bowl. Knead until all the flour is incorporated, and the dough is smooth and elastic, about 5 minutes. The dough should still feel moist and slightly tacky. If it’s sticking to your hands and countertop like bubble gum, work in more flour, one tablespoon at a time, until it is smooth.
- Cover the dough with the upside-down mixing bowl or a clean kitchen towel while you prepare the pizza toppings.
- When ready to make the pizza, tear off 2 pieces of parchment paper roughly 12 inches wide. Divide the dough in half. Working with one piece of the dough at a time, form it into a large disk with your hands and lay it on the parchment paper.
- Work from the middle of the dough outwards, using the heel of your hand to gently press and stretch the dough until it’s about a 1/4-inch thick or less. For an extra-thin crust, roll it with a rolling pin. If the dough starts to shrink back, let it rest for 5 minutes and then continue rolling.
- Spread a few tablespoons of sauce into the center of the pizza. Pile on your toppings. Slide your pizza (still on the parchment) onto a baking sheet and place in the oven. Bake for about 5 minutes, then rotate the pizza, removing the parchment from under the pizza as you do so. Bake for another 3 to 5 minutes until the crust is golden-brown and the cheese looks toasty. Remove the pizza from oven and let it cool on a wire rack. Repeat steps 7-9 for the second pizza.
![]()
SUMMER FRUIT
Summer brings the joy of fruit to the Teaching Farm. We have over 35 different fruit trees, bushes, and vines at Hayes. You can find apples, peaches, strawberries, blueberries, pears, figs, persimmons, blackberries and many more!
Since students have not been around to enjoy the them, we have been preserving the fruit to use for future culinary activities. We have been freezing and even turning some of the fruit to jams! We hope to see everyone soon and be able to share them!
GARDEN PICKLES
Prep time: 20 min. Makes 3 (8 oz.) jars
—2-3 cucumbers
—1 jalapeño (optional)
—1 cup water
—1 cup vinegar
—1 Tbsp salt
—1 Tbsp sugar
—Spices and herbs, to taste (garlic, dill, mint, cayenne, mustard seed, pepper, caraway, thyme, oregano, etc.)
- Cut cucumbers into slices or spears.
- Place desired herbs and spices into the jars.
- Pack the cucumbers into the jars, making sure there is a 1/2 inch of space from the rim of the jar to the tops of the vegetables.
- Combine water, vinegar, salt and sugar in a bowl. Stir to dissolve salt and sugar.
- Pour liquid into jars so that all cucumbers are covered, filling the jar about 1/2 inch from the top.
- Place lid on the jar. Refrigerate for 1-4 days— the longer you wait, the more flavorful your pickles will be.
- Open and enjoy!

![]()
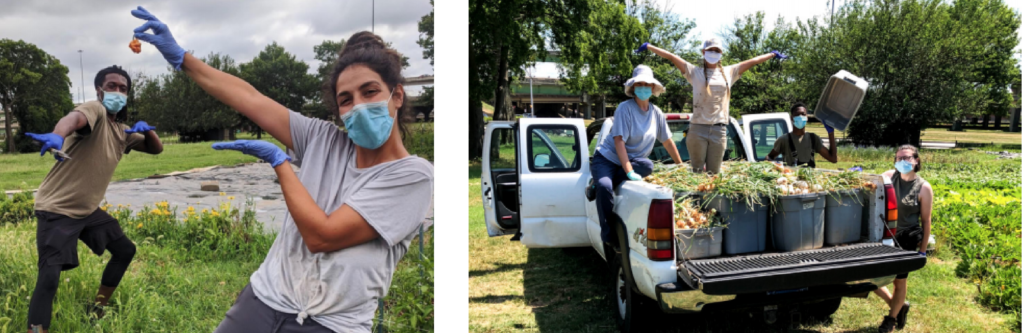
WASH STATION SHADE
The wash station is a very important part of the Teaching Farm at Oliver Elementary School. Once our fruits and vegetables are harvested, they need to be processed. When processing our vegetables we wash and clean them of any dirt, debris, or bugs. Once they are washed we allow them to dry, then we pack them in bags and store in the walk in refrigerator at Woodlawn High School so that they can get sorted and sent to families in the neighborhood! The original wash station was built a few years ago and this summer we were able to have a shade covering built over the sink and tables. Shade is important on the Teaching Farm because it keeps our produce from wilting. We are very grateful to Jack Roussel and Eagle Scout Troop 28 for this beautiful structure. Jack led the design and building and did a great job!
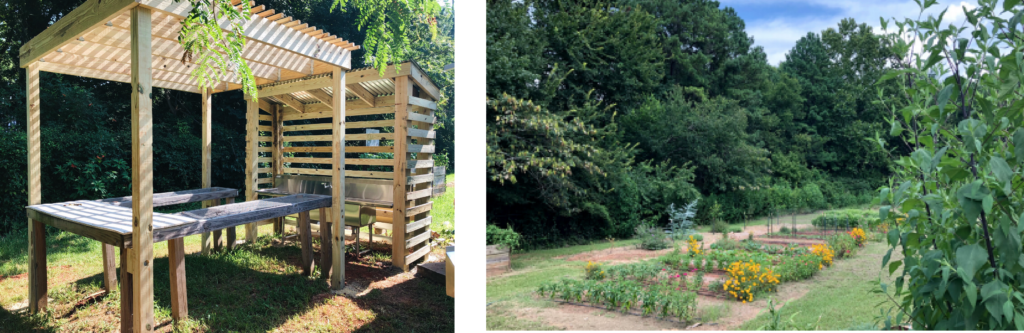
POLLINATORS
In the spring we planted an array of flowers so that they would be in full bloom during the summer. There are many benefits of having flowers on the Teaching Farm. Not only do they make beautiful bouquets but they are tasty food for our butterflies and bees. As they eat the pollen and fly from one flower to the next, they carry a little bit of pollen with them. This is called pollination. Pollination benefits our farm because about 30% of vegetables depend on pollination to grow!
![]()
CHERRY TOMATOES
Cherry tomatoes, miniature versions of regular tomatoes, are one of our favorite foods on the Teaching Farm. Did you know that there are over 10,000 varieties of tomatoes grown around the world? That means you could eat a different type of tomato everyday for 28 years! Tomatoes come in an array of colors from pink, black, yellow, white, purple and of course classic green and red. Tomatoes can be enjoyed in many dishes such as salsa, pasta, and salads. Try our recipe on the right for a delicious way to eat them next!
PICO DE GALLO
Ready in 10 minutes
—2 beefsteak tomatoes or two pints of cherry tomatoes
—1/2 medium red onion
—Small handful cilantro
—2-3 hot or medium peppers of choice – jalapeños if you like it hot, poblano for a milder flavor
—1 Tablespoon lime juice
—Salt, optional
- Mince tomatoes, onion, cilantro and peppers into fine pieces.
- Stir the ingredients together and season to taste with lime juice and salt.
- Serve immediately. Enjoy with chips, on tacos, burritos, or any of your other favorite foods!
![]()
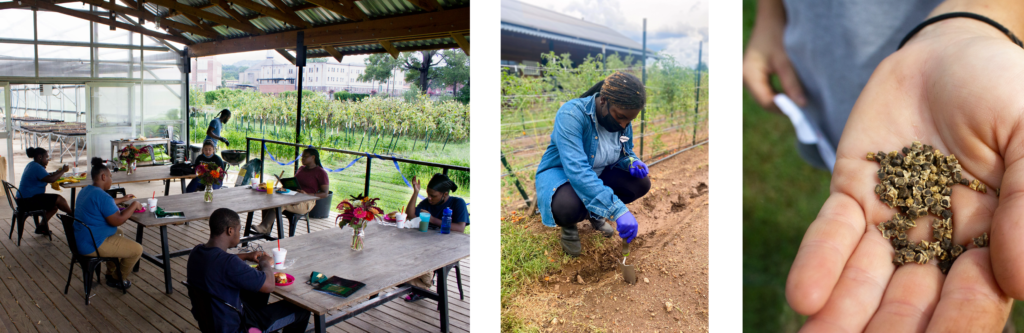
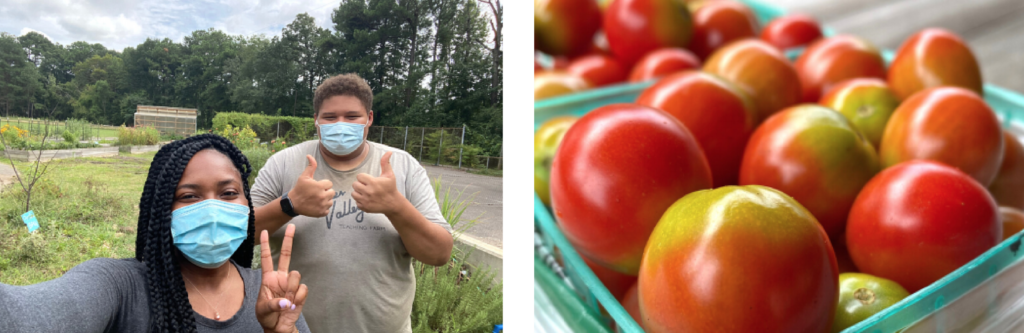
CELEBRATING OUR APPRENTICES
The best part of the farm is getting to work alongside wonderful people. Our class of 2019-2020 WHS Apprentices provided an incredibly positive energy, constantly encouraged one another, and worked hard through every season. Even as COVID spread and we had to shift to working from home, they brought enthusiasm to our book discussions and grew lots of veggies at home. Finally, with safety protocols in place, we returned to the Teaching Farm together. On their last day, we celebrated with a socially-distanced meal and charades. We are so proud of their work and will miss their presence immensely. While most are moving on to other jobs or school, Avant will continue working with JVTF as a Graduate Apprentice!
FARMING WITH THE OLDEST TOOL
During our book study of Leah Penniman ‘ s Farming While Black, we learned of many contributions to agriculture by people of color. We use these tools and technologies, like the trowel, all the time on the farm. In the picture below, Gabby is transplanting a collard plant from the greenhouse into the soil. She uses a trowel to help dig each hole. This tool was originally used by foragers in Africa digging up tubers. Once people began farming, it was adapted to poke holes in the ground for seeds. Over time, farmers added iron ends and made them flatter and wider. Some of the first planting knives, called couteau de culture, were developed by farmers in Cameroon, Gabon, and Congo and evolved into the trowel we use today.